
Retaining Wall Drainage: How to Stop Water Pushing Your Wall Over

By
Alistair Bethke, Founder
30+ years in Melbourne horticulture and civil works
Most retaining walls that fail aren't too weak. They're too wet. Retaining wall drainage is the part of the job nobody sees once the backfill goes in, and it's the part that decides whether a wall stands straight for decades or starts leaning after a few wet Melbourne winters.
Water builds up behind a wall, the soil gets heavier, and the pressure keeps climbing until something gives. Sleepers bow, blocks crack, footings shift. Here's how proper drainage stops that from happening, what it involves on different wall types, and how to tell when an existing wall isn't coping.
Why water is the real problem
A retaining wall is designed to hold back a certain load of soil. Dry or damp soil is one thing. Saturated soil is another. Once water has nowhere to go, it fills the gaps between soil particles, adds weight and pushes sideways against the back of the wall. That extra force is called hydrostatic pressure, and it's the main reason walls lean, bulge or crack.
Water does slower damage too. It sits against timber sleepers and rots them from behind. It carries salts through masonry and leaves white staining on the face. It softens the ground under the footing so the wall starts to settle unevenly. None of it happens overnight, which is why a wall can look fine for a few years and then go downhill quickly.
Melbourne's clay makes it worse
Large parts of Melbourne sit on clay-heavy soils. Clay holds water and drains slowly, so after a run of rain the ground behind a wall can stay saturated for days. Reactive clays also swell when wet and shrink as they dry out over summer, so the wall cops a push-and-pull cycle every year on top of the normal load.
Using the site's own clay as backfill behind a wall is one of the most common shortcuts, and one of the most expensive mistakes. It's cheap on the day. It's effectively a sponge sitting against the back of your wall.
The four parts of good retaining wall drainage
A properly drained wall isn't one product. It's a small system, and each part does a different job. Skip one and the rest work a lot less well.
1. Free-draining backfill
Directly behind the wall goes a band of clean, free-draining aggregate rather than site soil. Water moves down through the gravel instead of sitting against the wall. The width and grade of that drainage zone should come from the wall's engineering or the manufacturer's specification, since it depends on the wall height and the soil behind it.
2. Geotextile fabric
Gravel on its own slowly clogs as fine soil particles wash into it. A layer of geotextile fabric between the gravel and the surrounding soil lets water through but holds the fines back, so the drainage zone keeps working years down the track. In clay, this matters even more.
3. Ag pipe at the base
Slotted agricultural pipe, usually wrapped in a filter sock, runs along the base of the wall inside the gravel. Water that drains down through the backfill collects in the pipe and gets carried away. The pipe needs to be laid with a consistent fall so it actually flows, not dead flat where water and silt can sit.
4. An outlet that goes somewhere
This is the step that gets missed most. An ag pipe that runs to nowhere just stores water at the bottom of the wall. It needs to discharge to a proper point, typically the property's stormwater system. Draining it onto a neighbour's land isn't an option, and it's a reliable way to start a dispute.
Good retaining wall drainage also starts above the wall. Shaping the ground at the top so surface water runs away from the wall, or catching it with a dish drain, means far less water ends up in the backfill to begin with.
Retaining wall drainage solutions by wall type
The principles stay the same, but each type of wall handles water a little differently.
- Timber sleeper walls: some water seeps through the gaps between sleepers, but that's not a drainage system. They still need gravel and ag pipe behind them, and keeping water off the timber is what stops them rotting out early.
- Concrete sleeper walls: no rot to worry about, but the steel posts and footings still rely on the ground around them staying stable. Same drainage approach as timber.
- Block and masonry walls: often built with weep holes near the base so water can escape through the face, alongside ag pipe behind. White, chalky staining on the face is a sign water is moving through the wall rather than around it.
- Poured concrete walls: commonly paired with a waterproof membrane on the retained side plus a drainage layer, especially where the wall is next to a building or a finished living space.
- Gabion and dry stone walls: free-draining by design, since water passes straight through the rock. They still benefit from fabric behind them to stop soil washing through the gaps.
Signs your retaining wall drainage isn't working
Walls usually give plenty of warning before they fail. The earlier you catch it, the more options you have.
- Leaning or bulging: any outward tilt or belly in the face means the wall is under more load than it was built for.
- Water seeping at the base: wet patches or staining along the bottom of the wall after rain.
- White, chalky deposits: efflorescence on brick, block or concrete is salt left behind by water moving through the wall.
- Soggy ground at the top: pooling or boggy lawn above the wall that takes days to dry out.
- Soil washing through: dirt appearing in gaps or on paving at the base of the wall.
- Rotting or split sleepers: soft, dark or cracked timber, usually worst at the bottom courses.
- Cracks that keep growing: stepped cracking in masonry or new cracks after each wet season.
Can you fix drainage on an existing wall?
Sometimes, if you get in early. A blocked outlet can be cleared. Weep holes clogged with soil can be opened up. Better surface drainage at the top can take a lot of water out of the equation. On a wall that's still straight, those fixes can buy a lot of time.
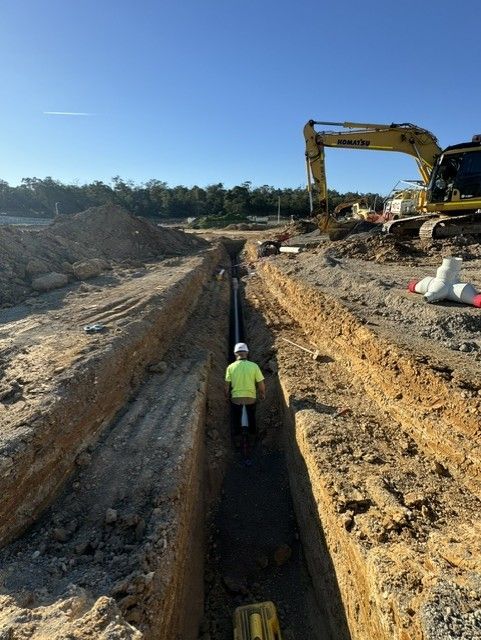
If there was never any drainage to begin with, or the wall is already leaning, it's a different story. Fixing it properly means digging out the backfill behind the wall, which on most walls is close to rebuild territory anyway. That's also where machinery and access come into it. Excavating behind a wall on a tight inner-suburb block without undermining the house, the fence or the wall itself is careful earthmoving work, not a weekend job.
Get it right when the wall goes in
Drainage costs very little extra at build stage compared with digging it in later. While the ground is open and the machine is on site, gravel, fabric and ag pipe are a small line item. Once the wall is backfilled, paved over and planted out, that same work becomes a major job.
It's also worth checking approvals early. In Victoria, a retaining wall 1 metre or higher generally needs a building permit, and lower walls can need one too if they're near a boundary or protecting a neighbour's property. Walls that need engineering will usually have the drainage specified as part of the design. Your local council or a building surveyor can confirm what applies to your site.
How CHS approaches it
Retaining walls sit right where the two sides of CHS meet. The civil side handles the excavation, the footings and the drainage behind the wall through our earthmoving and transport work. The landscape side builds the wall itself and everything that ties into it, from steps and paths to the planting on top, as part of our paving and hardscaping and wider landscape construction work.
[CONFIRM WITH CHS: one real retaining wall job, e.g. the suburb, wall type, and how the drainage was handled behind it.]
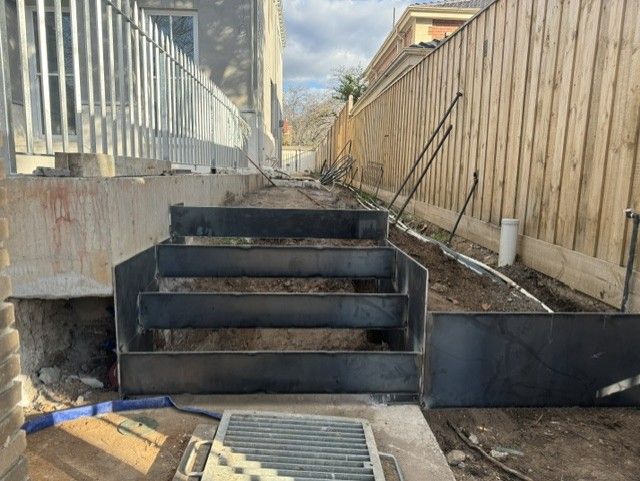
The same thinking applies anywhere a change of level holds back soil. On a recent narrow side access, getting drainage right behind a set of steel garden steps was as important as the steel frame itself.
Build it once, drain it properly
A retaining wall is only as good as what's going on behind it. Free-draining backfill, fabric, a properly laid ag pipe and an outlet that actually goes somewhere will do more for a wall's lifespan than the material on the face. On Melbourne clay, it's not optional.
If you're planning a retaining wall, or you've got one that's starting to lean, get in touch and we'll take a look at what your site needs.
Frequently Asked Questions
Does every retaining wall need drainage?
Almost every wall that holds back soil benefits from drainage, and on clay-heavy Melbourne soils it's close to essential. Very low garden edging may get by without it, but anything genuinely retaining a change of level should have free-draining backfill, an ag pipe and an outlet.
What is the best drainage behind a retaining wall?
A combination of clean, free-draining gravel directly behind the wall, geotextile fabric separating it from the surrounding soil, slotted ag pipe at the base laid with a fall, and a proper outlet to stormwater. Managing surface water at the top of the wall also reduces how much water reaches the backfill.
Where should retaining wall drainage go?
It should discharge to a proper point, usually the property's stormwater system. It shouldn't be left to soak into the ground at the base of the wall, and it can't be directed onto a neighbouring property.
How do I know if my retaining wall is failing?
Common signs include leaning or bulging, water seeping or staining at the base, white chalky deposits on the face, boggy ground above the wall, soil washing through gaps, rotting sleepers and cracks that keep growing. Any of these is worth having looked at before it gets worse.
Do I need a permit for a retaining wall in Victoria?
Generally, a retaining wall 1 metre or higher needs a building permit in Victoria. Lower walls can also need one if they're close to a boundary or protect an adjoining property. Check with your local council or a building surveyor before work starts.